Reduced heating or cooling output, unusually long run times, ice forming on the indoor coil or suction line, and hissing or bubbling sounds near the refrigerant lines are the clearest refrigerant leak symptoms in a heat pump or HVAC system. Oily residue at fittings often confirms it. Refrigerant isn't consumed like fuel, so a low charge always means a leak, and simply topping off the system without repairing it is not a fix and may violate EPA rules. If you notice these signs, shut off the affected zone and call an EPA-certified technician instead of adding refrigerant yourself.
TL;DR:
- A refrigerant leak often causes ice formation on coils and prolonged system run times, with refrigerant oil residue at fittings confirming the issue.
- Electronic leak detectors and vacuum rise tests are the most accurate methods for pinpointing leaks and confirming system integrity, respecting EPA regulations.
- Homeowners should avoid adding refrigerant themselves and instead gather evidence like photos and notes to support professional diagnostics and repairs.
- Repair costs vary based on leak location and system components, with proper documentation and verification necessary for warranties and rebate requirements.
- Regular maintenance and correctly sized systems prevent leaks caused by vibration and improper fittings, reducing long-term repair needs and costs.
Table of Contents
- What do refrigerant leak symptoms actually look like?
- How do professionals confirm a refrigerant leak?
- What should you do right now?
- What determines repair cost and timeline?
- How proper installation and maintenance prevent leaks
- What the average homeowner gets wrong about refrigerant leaks
- How to get a leak diagnosed and prevent the next one
- Sources
- FAQ
What do refrigerant leak symptoms actually look like?
Most homeowners notice a refrigerant leak long before they can name it. The system just seems to be working harder for less comfort. Here's how the common symptoms of refrigerant loss show up in the real world, and how to tell them apart from a clogged filter or a dying blower motor.
Reduced capacity and long run times are usually the first clue. If your heat pump used to warm the house in 20 minutes and now runs almost continuously without hitting the thermostat setpoint, check the temperature difference between the supply and return air. A healthy system typically produces a noticeable delta-T; a shrinking gap points toward low charge rather than a dirty filter, which tends to reduce airflow evenly rather than sap capacity.
Ice or frost on the indoor coil or suction line is one of the most reliable air conditioner gas leak symptoms because it has a clear mechanical cause. Low refrigerant pressure drops the coil temperature below freezing, so moisture in the air freezes onto it instead of condensing off. Snap a phone photo of the ice for your technician. It's genuinely useful diagnostic evidence, and there's nothing unsafe about looking or photographing from outside the cabinet.
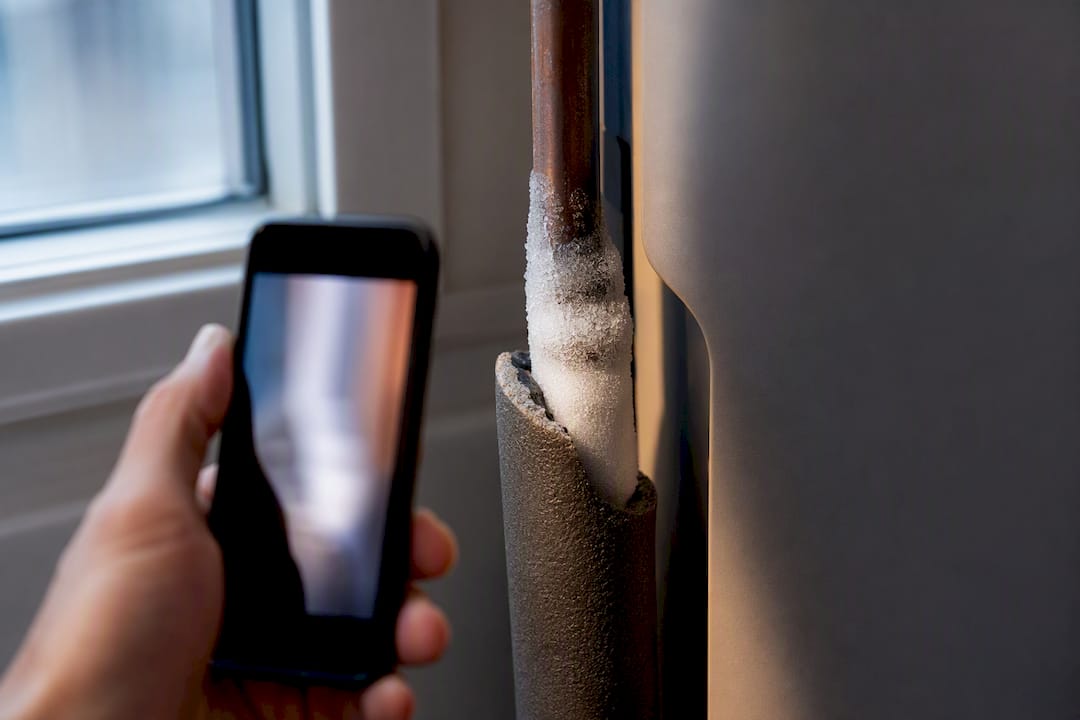
Hissing, bubbling, or oily residue near flare fittings or line joints are direct signs of refrigerant leak activity. Refrigerant carries a small amount of oil with it, so a stain at a joint usually marks the exact leak point.
Other clues to log:
- Abnormal short-cycling or the compressor struggling to start
- Energy bills climbing without a change in usage habits
- Uneven temperatures between rooms served by the same system
Document what you see and hear, but stop there. Common signs of refrigerant leaks include exactly these symptoms, and none of them require opening a sealed refrigerant circuit to confirm.
How do professionals confirm a refrigerant leak?
Homeowner observation narrows down the problem. Confirming it, and finding the exact leak point, requires equipment most people don't own.
Electronic leak detectors (ELDs), using heated diode or infrared sensors, are the current professional standard. They read refrigerant concentration directly and produce far fewer false positives than older bubble tests, which is why technicians favor electronic detectors over bubble solutions for tracing small or slow leaks around fittings and coils.
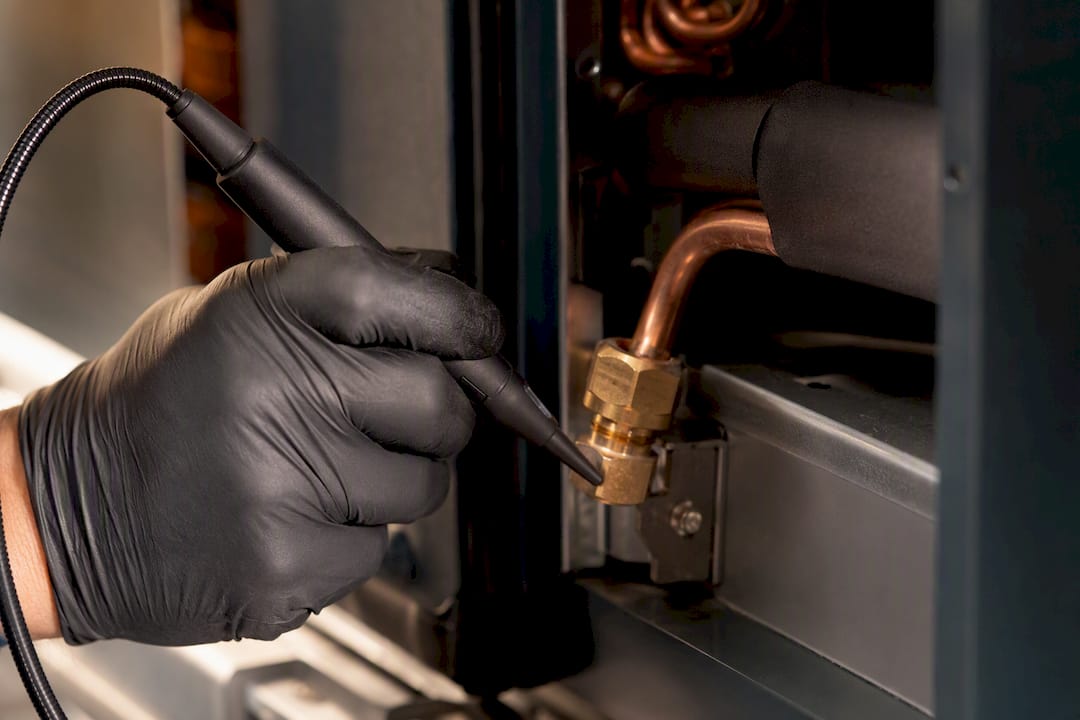
The vacuum pull-down and rise test is the definitive integrity check. A technician pulls the system down to a deep vacuum, ideally 200 to 300 microns and never above 500, using a lab-grade two-stage pump, then isolates it and watches the gauge for 30 minutes. If the reading climbs significantly during that hold, the system isn't sealed. That's a real leak, moisture contamination, or both, according to code-compliance guidance on vacuum testing, which also notes that gauge placement matters: a micron gauge mounted near the pump instead of at the system's farthest point can read 200 to 300 microns lower than reality.
Pressure testing, ultrasonic detection, and fluorescent dye each have a role, but limits too. Bubble and simple pressure tests can miss slow leaks that an ELD or ultrasonic scan would catch.
- ELDs: best for pinpointing active leak locations
- Vacuum rise test: confirms whether the whole system holds
- Dye and ultrasonic tools: useful backups, not primary evidence
EPA Section 608 ties into all of this directly. Systems that exceed federal trigger leak rates require documented repair and verification testing, not just a recharge.
Pro Tip: Ask your technician for the actual micron reading from the vacuum test in writing, not just a verbal “it held fine.” A documented number protects you if a warranty claim or rebate inspection ever questions the repair.
What should you do right now?
- Turn off the affected zone if you see active ice buildup, hear a loud or continuous hiss, or notice fresh oil spray. Continued operation on a low charge stresses the compressor and can turn a repair into a replacement.
- Never attempt to add refrigerant or vent it yourself. Doing so without proper certification skips the diagnosis entirely and can run afoul of EPA rules.
- Gather evidence before the technician arrives: photos of ice or oil, notes on run times and thermostat settings, recent energy bills, and your unit's model and serial numbers.
- Choose an EPA-certified technician with heat pump experience, and ask upfront whether they'll provide documented leak verification results.
- Treat these as urgent: total loss of heat in freezing weather, a loud continuous hiss, or visible oil spray warrant a same-day call, not a wait-and-see approach.
What determines repair cost and timeline?
Repair timelines and cost swing on a few variables: how accessible the leak is, whether a flare fitting needs re-flaring or a coil needs replacing, what refrigerant type the system uses, and straightforward labor time. A leak at an exposed line set fitting might be a same-visit fix; a coil leak buried in the air handler is a bigger job.
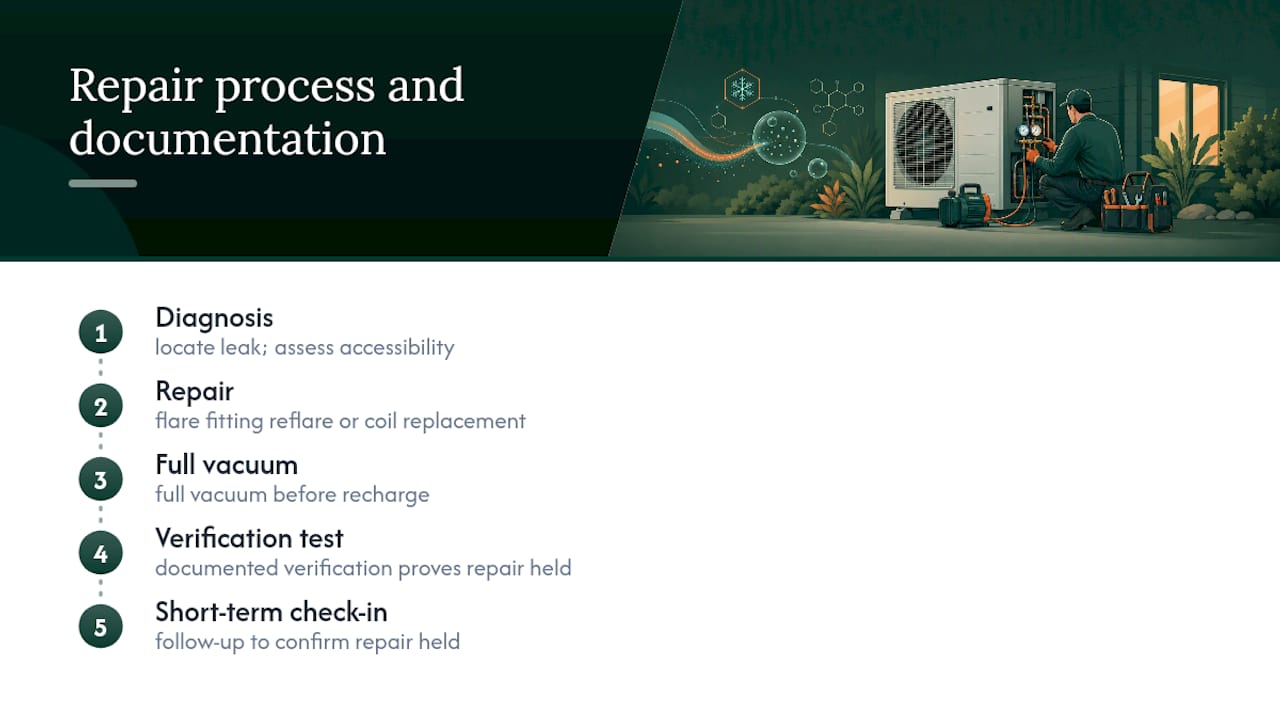
A typical sequence runs diagnosis, then repair, then a full vacuum and verification test before recharge, followed by a short-term check-in. Systems that exceed EPA trigger leak rates fall under mandatory repair windows, often 30 days for many comfort-cooling appliances, which is part of why documented verification matters so much: it's the record that proves the repair actually held.
Repeated top-offs cost more over years than a single documented repair, and they can jeopardize manufacturer warranties that require proof of proper service. Before committing to a repair path, check your heat pump warranty terms and any available rebates, since some programs have their own documentation requirements.
How proper installation and maintenance prevent leaks
Most refrigerant leaks Hitamaine's technicians trace back to two causes: vibration rub-outs, where a copper line contacts a metal support and wears through over years, and faulty flare fittings, common in ductless mini splits when a connection wasn't torqued correctly during installation.
Custom sizing based on real heat-loss calculations reduces this risk from day one. An oversized or undersized system cycles harder and vibrates more, accelerating wear at exactly the points that fail. Scheduled maintenance visits that check for line rubbing, inspect fittings, and run periodic ELD sweeps catch problems before they become mini split low refrigerant symptoms your household notices firsthand. Ask any technician, Hitamaine's or otherwise, for written test documentation, and consider a maintenance plan that builds these checks in as routine.
What the average homeowner gets wrong about refrigerant leaks
The most common mistake isn't ignoring symptoms. It's treating a recharge as a repair. A lot of well-meaning advice online still frames "low on refrigerant" as a maintenance item, something you top off like windshield washer fluid. It isn't. If the charge is low, refrigerant went somewhere, and it will keep going somewhere until the leak is found and fixed.
The second mistake is trusting a soap bubble test as a final answer. It's a fine first pass for an obvious leak at an accessible fitting, but it routinely misses small or slow leaks that only a proper vacuum rise test or an electronic detector will catch. A system that "seems fine" after a bubble check can still be leaking a few ounces a season, enough to shorten compressor life over several years.
What should homeowners prioritize? Ask for the number, not the assurance. A technician who can hand you a micron reading and a description of what was repaired has actually verified the fix. One who just says "topped it off, should be good" hasn't.
— John
How to get a leak diagnosed and prevent the next one
Suspected refrigerant leak symptoms deserve a technician who documents the fix instead of just recharging and hoping it holds. Every repair is built around verified vacuum readings and ELD sweeps, supported by service plans designed for cold-climate systems.

Start with a diagnostic visit or repair service if you're seeing ice, hissing, or reduced output right now. Have your ZIP code ready so service can be confirmed for your area, along with your system's model and serial numbers and any photos or notes you've collected. After the repair, Hitamaine documents the verification readings, lists exactly what was repaired, and recommends next steps, which for many homeowners means enrolling in the Annual Cleaning Plan at $219 per year or the more comprehensive Maine Heat Pump Care Plan at $319 per year, both built to catch vibration rubs and fitting wear before they become the next leak. If your system is older or this is its second or third leak, it may be worth discussing a change-out instead of another round of repairs.
Sources
Repair obligations under leak trigger rates come from the EPA's Section 608 program. Vacuum testing standards and ELD procedures draw on ASHRAE-referenced, lab-grade testing guidance used across the HVAC trade.
- Stationary Refrigeration Leak Repair Requirements | US EPA
- Lab-Grade Vacuum Pump Setup Electronic Leak Detection: a Code Compliance Guide | HVAC Laboratory
- Refrigerant Leak Signs in a Heat Pump or AC | WattSimple
- Better than bubbles: The ins & outs of electronic leak detectors | Fieldpiece
FAQ
What are the first signs of a refrigerant leak in a heat pump?
The earliest signs of refrigerant leak are usually weaker heating or cooling, longer run times, and rising energy bills before anything visible appears. Ice on the coil or suction line and hissing near fittings tend to show up as the leak worsens, and both point to refrigerant leak signs that need a professional look.
Can I just add more refrigerant instead of finding the leak?
No. Refrigerant isn't consumed during normal operation, so a low charge always means it's escaping somewhere, and simply recharging doesn't stop that. The EPA requires leak repair and documentation rather than repeated top-offs once a system exceeds its trigger leak rate.
How do technicians actually detect a refrigerant leak?
Technicians rely on electronic leak detectors for pinpointing the exact leak location and a vacuum pull-down and rise test to confirm the whole system holds. A rising micron reading during a 30-minute hold is a reliable sign of an active leak, and electronic detectors outperform older bubble tests for catching smaller ones.
How much does refrigerant leak repair typically cost?
Cost depends heavily on leak location and what needs replacing, a fitting repair costs far less than a coil or compressor swap, so there's no single number that applies to every system. Hitamaine's one-time deep cleaning starts from $249, and a diagnostic visit is the first step toward an accurate repair quote for your specific unit.
Is it safe to keep running my heat pump with a suspected leak?
Running a system with active ice buildup or a loud hiss puts extra strain on the compressor and can turn a fitting repair into a full component replacement. Shut off the affected zone and schedule a diagnostic and repair visit rather than waiting out the season on reduced output.